This is just a capture of the now offline ct90-ct110.com customisation section detailing the front cargo rack.

Front Cargo Rack
Over the past few years, I’ve been bringing back the CT Front Cargo Rack that I purchased from New Zealand and Australia Honda motorcycle dealers, for friends here in the U.S.
BTW, these CT Front Cargo Racks will fit any Honda Trail 90 as long as it has telescoping front forks and all CT110’s.
Now, I see that Jack at DrATV is selling them and his price is better than any price I purchased them at (I never marked up the price above what it cost me).
However, the CT Front Cargo Rack does not come with any assembly instructions (it’s typically sold by Honda dealers as individual parts), so, here’s the assembly instructions that I’ve used (just in case Jack doesn’t pre-assemble the components).
Here’s a pic of the individual parts.
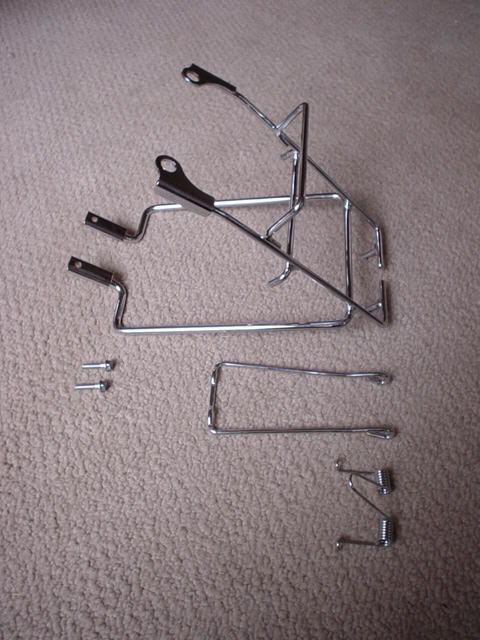
Here is the breakdown on
part numbers, description, qty.
******************************************
81100-459-880, Carrier Frame, 1
81101-459-880, Clamper Frame Carrier, 1
81102-086-901, Spring Clamper, 1
957010602500, Bolt Flange 6×25, 2
******************************************
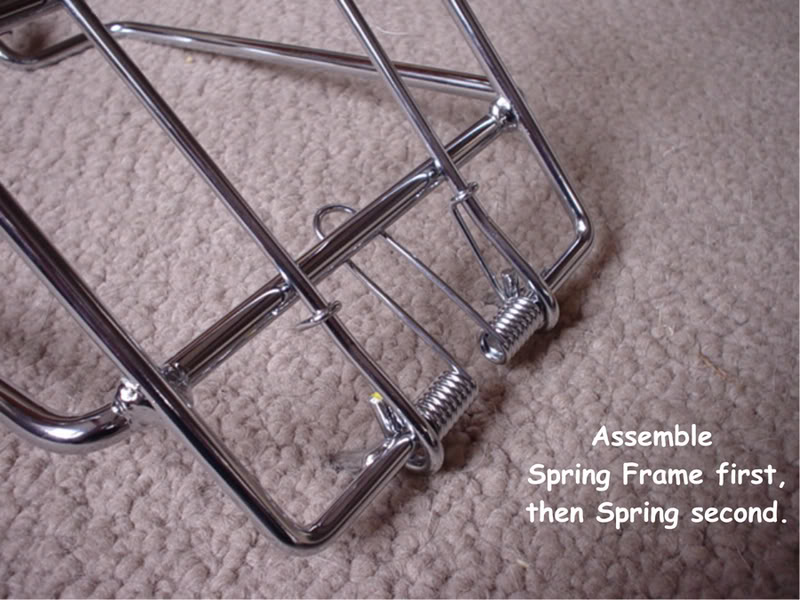
To assemble the Clamper Frame Carrier and the Spring Clamper, slide the Clamper Frame Carrier (the part that will hold things on to the CT Front Cargo Rack) looped ends onto the open front section of the Carrier Frame by squeezing the two loop ends together. Then hook the middle loop of the Spring Clamper under the Carrier Frame, squeeze the Spring Clamper “spring section” together and slip the “spring section” over the open front section of the Carrier Frame one side at a time. Lastly, using either a pair of pliers or a straight screw driver pull the ‘hook ends” of the Spring Clamper up and over the the Clamper Frame Carrier.
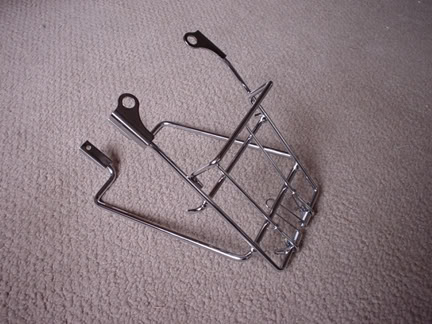
The CT Front Cargo Rack is now assembled, just not yet installed.
To Install the CT Front Cargo Rack on your CT.
The TOP FORK BOLTS on the triple tree need to be removed. These will be used again, so if they need to be cleaned up, do so now. Make sure your “O” rings are in good shape.
Special Note: Don’t “work” or “move” the front suspension up or down at this time, because you don’t want the fork oil (usually ATF fluid) to be forced out the top of the open forks.
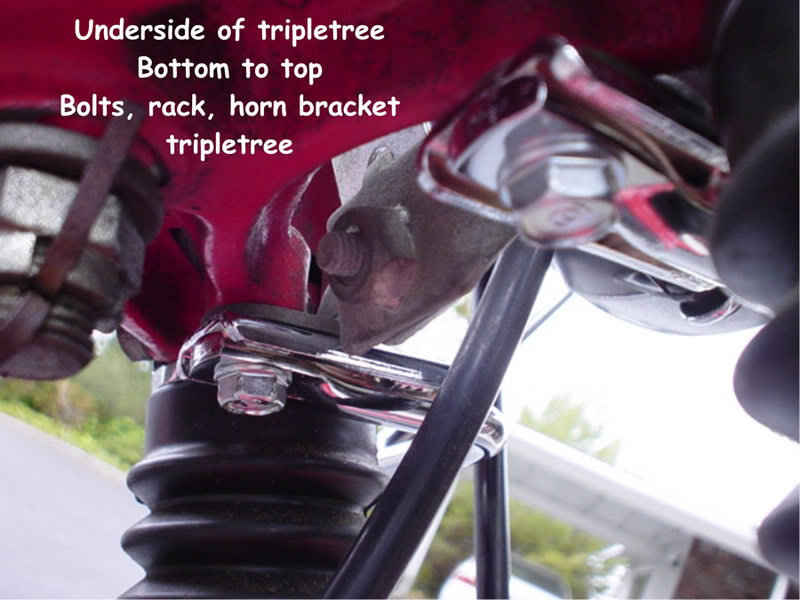
Under the triple tree are the two bolts that hold your horn bracket in place, Remove these bolts. They are too short and will be replaced by the two included longer ones (6×25).
Here’s a pic of the original short bolt and the new longer bolt.

If your horn stays in place (on the tripple tree, that’s great), if not, it will just hang on it’s wires (no problem).
Trial fit the CT Front Cargo Rack in place. About half the time I had to slightly bend the CT Front Cargo Rack to fit into place. Do so if you need to (just do a little bending at a time, you don’t want to over do it).
Once the CT Front Cargo Rack seems to fit properly, start by attaching the TOP FORK BOLTS, but only finger tight (and DO NOT use any thread adhesive). Then go to the underside of the triple tree and attach the bottom of the CT Front Cargo Rack in the correct order… bottom to top… New bolts, CT Front Cargo Rack, horn bracket and the screw the new bolts into the triple tree (Ok to use thread adhesive, if you want).
If everything looks good, then thigten all bolts up.
Here’s a pic of the completed underside mounting area.
I’d recommend that you ride your CT for awhile without putting anything on your new CT Front Cargo Rack, just to get used to the view over the handlebars. If you’ve been used to seeing exactly where your front tire is going to be, the CT Front Cargo Rack will be a slightly different view for you. Once you’re used to this new view, then try riding with a cargo bag up there.
Here’s a pic of the pilot’s view…

Here’s a pic of the CT Front Cargo Rack mounted to a CT.
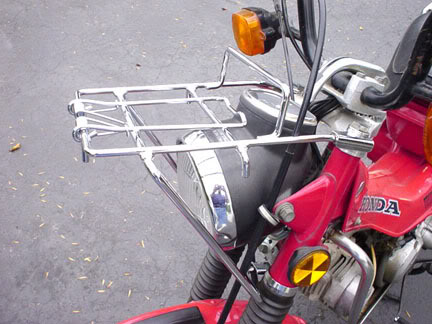
Congratulations, you now really have a rugged looking Honda Trail CT.

Leave a Reply